

Article By: Jacelyn Wedman
Have you ever printed a color, checked the print, and noticed it turned out different than you expected? That is called color shift. It will happen with every ink you print. Depending on a few key factors, you can end up with one color looking completely different than you anticipated.
Let's look at the different variables at play and show you how to make adjustments to deal with color shift both before you print and on press.
Opacity is how well light can travel through an object. If something is 100% opaque, then you will not be able to see through it at all. The white lid on a bucket of ink, for example, is considered opaque because no light is able to move through it. Light will only reflect and absorb off its surface.

The water bottle is translucent, meaning you can see the bucket of ink through the bottle.
The less opaque—or translucent— something is, the more light will travel through the object, hit whatever is behind it (in this case, a T-shirt), and reflect back. This can make the translucent ink appear darker or lighter because its color is influenced by the T-shirt underneath.
Color shift is entirely due to the natural opacity of the inks you use and the kinds of garments you are printing those inks on.
To show you visually what colorshift looks like for you, ink expert Colin Huggins prints the classic line of FN-INK™ colors on two shirts: one black and one white. Half of the print is printed on an underbase, and the other half isn’t, meaning the ink is printed directly on the shirt as a side-by-side comparison. Printing directly on a white t-shirt gives you the most accurate color to the bucket, so it makes for a great control print.
Colors like magenta and navy are more translucent, so they are strongly influenced by the base white and the color of the shirt underneath the ink. When you print inks that are more translucent on a base white, the color will become lighter than the bucket. This is because the base white is being seen through the low-opacity inks.
Light is moving through the magenta, hitting the white underneath, bouncing off of that base white, and back to your eyes making it appear lighter than the control print.
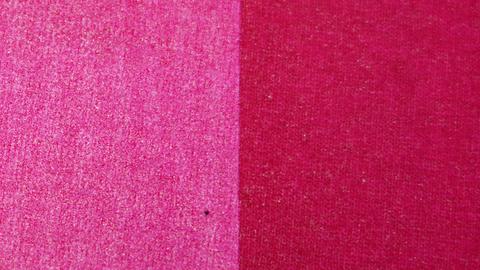
Magenta reflected off a base white (left) is much lighter than magenta printed directly on the t-shirt (right).
If you print low opacity colors directly on a black shirt, the color becomes more difficult to see. The black shirt is being seen through the ink just like the base white. But in this case, it makes the ink color appear darker. Choosing a low opacity color like magenta to be in the design means you'll have to work a lot harder to make sure it comes out looking the way you want it to.
However, colors like fuchsia and light blue have a higher natural opacity. Even with the base white and black, there is still some color shift, but it is much less than colors like navy.
White reflects light and black absorbs light. The more black and white inside the ink, less light will be able to travel through because it is either being reflected by the white or absorbed by the black. All inks will have some degree of natural opacity. The ink's opacity is the main factor at play when it comes to how much ink will color shift on press.

Printing colors on a base white versus a black shirt causes major color shifts.
Now that you have an understanding of how ink's opacity affects color shift, how can you use this information to make adjustments before you get on press?
The unfortunate part is that there is no cut-and-dry way to make color adjustments. Every brand of ink, every ink line within those brands, and every color within those ink lines will have different natural opacities. To say the least, it’s very complicated.
The more that you understand how the natural opacity of the inks you use, the better you will get at making educated guesses on how to adjust. The more you test, the less time you'll need to correct the colors.
Here are some ways you can start to correct for color shifts.
Keep in mind that you will have to choose which tip is right for the job at hand and the inks you’re using.
Because there are so many variables at play here, the only way to truly figure out how to adjust your printing process is making educated guesses on how to adjust for color shift, test that, and go from there.

Though these shirts were printed with the same colors, they look very different.
Play around with the inks that you use. Experiment because the more you know how inks behave on the press, the less you will have to test. If you already use FN-INK™ then you have a head start on how your inks will behave.